
Hello, and welcome back! If you're just joining us, welcome to part one of the Pindows Quilt Tutorial. The Pindows pattern is a four-square, straight set windowframe layout of pinwheel blocks. Let's start with your supplies list:
- 40-piece charm pack
- 7 strips 2.5" x wof white
- 3 strips 1.5" x wof white
- marking tools: straight edge and disappearing ink pen
- sewing machine (or hand needles)
- rotary cutter or scissors
- white thread
Step one: from your charm pack, select coordinating pairs of fabric. If you are using two identical 20-piece charm packs, you may choose matching pairs so that your pinwheel blocks are all of one fabric, rather than scrappy.
You will need 16 pairs of charms for this quilt. If you have never made half-square triangle blocks, you may wish to use some of the fabric that won't be in the quilt for your practice blocks.

Step two: lay a charm square right-side up on your worktop, layer with a white square and draw a line diagonally with your straight edge and a disappearing-ink fabric marker or very faint pencil line:

Step three: pin your fabric together and stitch 1/4 inch on either side of the line you have marked

Step four: using your rotary cutter or scissors carefully trim the corner at each end of your stitched lines, then cut down the line you have marked.


Step Five: Carefully press open each half-square-triangle you have just cut apart. If you have a marked pressing pad, this is a good time to put it to use. Do not iron with a sweeping hand, since will distort your blocks. Instead, lay the HST on your ironing pad white side down, lift the tip of the printed fabric and gently press open with your hot iron. Go slowly and this will press the seam allowance towards the printed fabric. Repeat the pressing with the other half of the pair you just stitched, then repeat steps two through five with the coordinating fabric you have previously chosen.

Congratulations - you should have all four patches for your first pinwheel block ready to go!

Step six: trim your individual half-square triangle blocks to square (if necessary), then sew in pairs, matching a white and print edge as below:

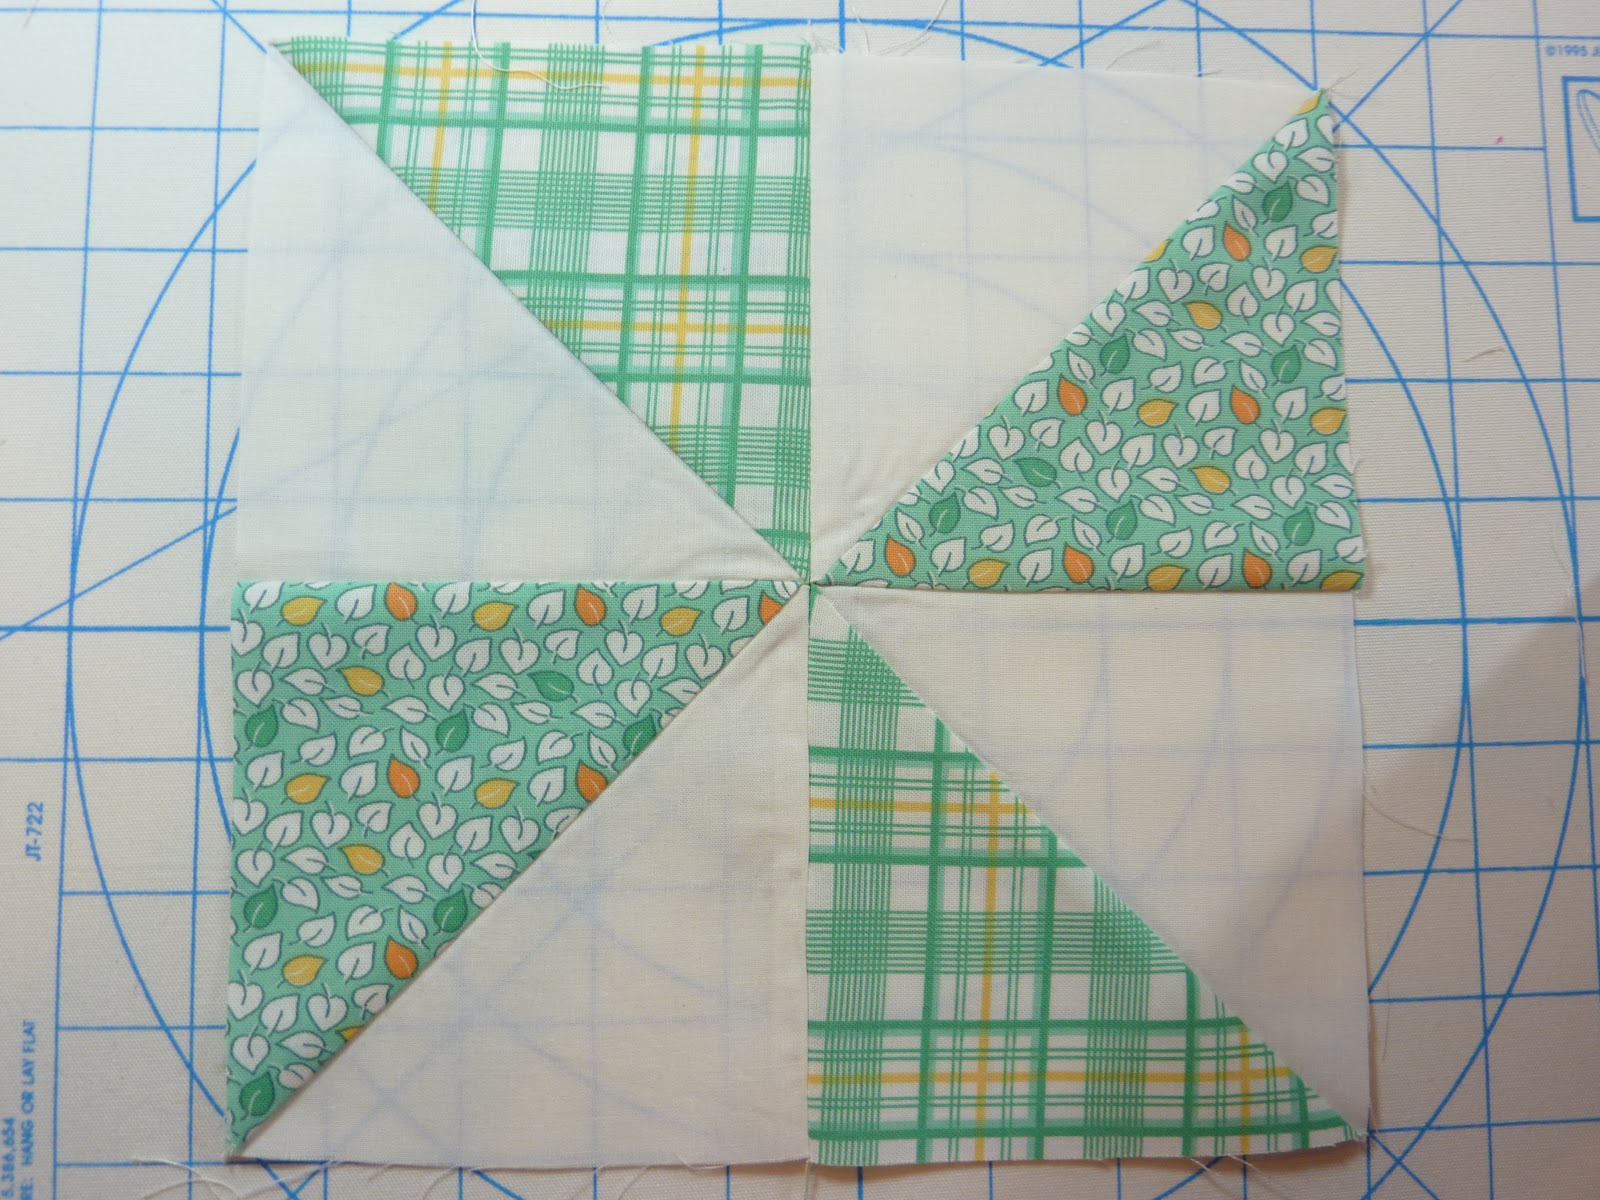
Step Seven: rotate your blocks and line up your seams as below:

Pin - more than you think you need to, especially if these are your first pinwheel blocks! Carefully stitch 1/4 seam down the length, removing your pins as you go:

Step Eight: press your blocks open. When doing pinwheels I always press the final seam open, but that's just a matter of preference, if you wish to press it to one side, go for it!

Tips for this section will follow in a new post. I you have an specific questions, please post them in the comments below. If you are just joining us and would like to enter to win your own pinwheel quilt kit, please comment for entry on this page.

4 comments:
Hi :) How many white squares will we be needing? 40 as well?
32 white, actually, since we are only using 32 prints.
Great tutorial. Thank you.
Pinwheels make me happy!
Post a Comment